Some rifles I have stocked or built

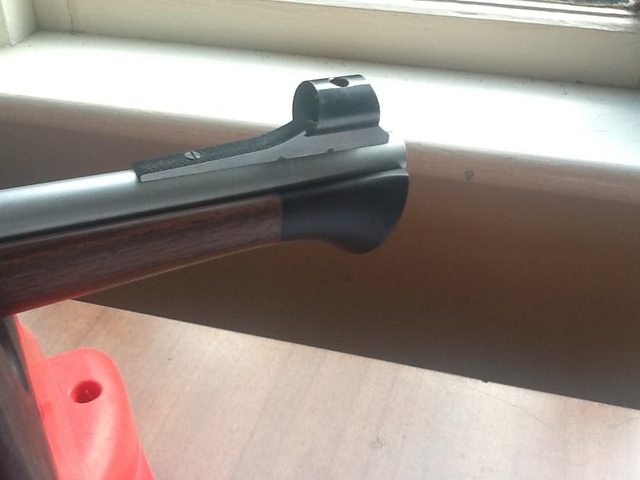
At this stage I needed a barrel hanger for the forestock so I started with a MLE barrel band attachment and opened it out to fit the martini barrel.
Photo2405.jpg

With it fitted to the barrel it needs marked on the forestock to position it correctly

Photo2407.jpg

Making sure the attachment screw hole is correctly aligned with what will be the bottom of the stock
Photo2408.jpg

Photo2409.jpg
Photo2410.jpg
Photo2411.jpg
Photo2412.jpg
 
It was at this stage that Euan asked if it was possible to fit a horn tip and while it would be possible it was going to require some exacting pin work.
Photo2418.jpg
Photo2422_zpsatqt4ryk.jpg
Photo2425_zpspghldj0y.jpg
Photo2432.jpg
Photo2434.jpg
Photo2435.jpg

After the finish was applied it looked rather smart
Photo2444.jpg
Photo2446.jpg
Photo2447.jpg
Photo2450.jpg
Photo2452 Martini sporter in 303.jpg
 
Von G - I have done some of what you are sharing, so can appreciate the work that goes into the wood-metal fit you picture. You are quite a craftsman!
 
Another one for Euan. He bought a 60's Fajen mannlicher blank at auction and wanted to sit a G 33-40 8x57 B/A into it with some style changes. One of his rifles had a P O W grip and asked if I would incorporate that into the mannlicher stock.
Photo3031.jpg
Photo3032.jpg

The first this to do was the inlet and I taped a drill bit (tape round the shank within the barrel to protect it) as an extension so I had something to grip when removing it from the stock during the inlet process.
Photo3042.jpg
Photo3043.jpg

The cheekpiece and grip shape needed attending to
Photo3051.jpg
Photo3052.jpg
Photo3053.jpg
Photo3054.jpg

I had a number of the sandcast butt plates and the length of the stock butt required a shortening of one to fit.
Photo3050.jpg

There was way too much wood through the action area and Euan wanted the lowered window through the side of the action rather that the usual thumb recess.
Photo3056.jpg
Photo3059.jpg

Photo3060.jpg

There was quite a bit of slimming to do for the full length of the forestock with some hardware to fit and in the end it turned out rather nicely.
DSCN0019.JPG
DSCN0020.JPG
DSCN0021.JPG
 
Last edited by a moderator:
von gruff,
I was going to repeat the question "what do you do in your spare time?"
but I will change the question to "when do you sleep".
the creative mind will never let the body rest.
bruce.
 
von gruff,
I was going to repeat the question "what do you do in your spare time?"
but I will change the question to "when do you sleep".
the creative mind will never let the body rest.
bruce.
Sleep is an over rated pastime but has very often been broken when some of my projects have had various problems worked through so that when I go to the shed the way forward is plainly obvious.
 
Von Gruff, you do some dang nice work, I hate it that you live so far away.
 
Another friend had bought this BSA cheap because there was a big crack in the stock so a replacement was needed but John is a big man and he also required a bit more length. For whatever reason he liked the stock style and wanted it replicated with its triangular fore stock and reverse angle fore end tip. A plank of walnut was the place to start
DSCN0012.JPG
DSCN0013.JPG

Checking for cast
DSCN0015.JPG

inlet done
DSCN0018.JPG

Ebony tip on, The grip cap was done later.
DSCN0028.JPG
DSCN0029.JPG
DSCN0030.JPG


butt pad on
DSCN0039.JPG

start some shaping. The wrist end of the cheekpiece is too low here but I altered that before finishing the stock.
DSCN0045.JPG
DSCN0051.JPG
DSCN0052.JPG

ready to go back to John
DSCN0108.JPG
DSCN0109.JPG
DSCN0110.JPG

DSCN0111.JPG

At the same time I re-finished his little 22 that had been his rifle as a boy. It had years of use showing so a little work to get it right and to make sure the original BSA impression on the buttstock was still featured as intended.
DSCN0107.JPG
 
Last edited by a moderator:
Von Gruff, how do you make those tight radius curves when rough sawing out a blank? It looks like you could use either a band saw and or a table saw for the straighter cuts, then maybe a jig saw for the sharper radius cuts?
 
Some barrel channel pull scrapers I made. Three different barrels that I use for push scrapers had a slice cut off the end
Photo1712.jpg

8 x 1/4 bolts so the barrel slices were drilled to except the bolts
Photo1713.jpg

Handles from an old broomstick
Photo1714.jpg

and with the barrel slices sharpened they give four faces to scrape with before needing to be touched up on a stone. Use one edge and then turn the barrel slice 180 degrees for the other edge on the same face to be used then it can be turned for the other end and its two edges but there are quite a few barrel channels that get done with the 4 edges. The bends in bolt shaft are the same. It is just how they lay on the bench that makes them look different.
Photo1715.jpg
 
Von Gruff, how do you make those tight radius curves when rough sawing out a blank? It looks like you could use either a band saw and or a table saw for the straighter cuts, then maybe a jig saw for the sharper radius cuts?
On the BSA I used the jigsaw because the walnut plank was too big to do on the bandsaw which is what I cut them on when I use one of the blanks from NZ Walnut.
 
Another Lee Speed styled stock that now resides in the US and one of the 5 or 6 that I ended up sending to the US and Canada.
Starting from an 1899 MLE action with a barrel that was going to be bored out to make a 375-303
1.png
131.png

131 2.png
131 3.png
131 1.png

Bills Lee Speed.png
Photo2213.png
Photo2215.png
Photo2216.png
Photo2217.png
 
Another Mannlicher with this one being on a Sako and Dean wanted the big (donkey d**k) schnabel tip. His instructions were to replicate the Sako stock through to the front of the action then have the long forestock with the (african blackwood) tip . This was the pic he supplied that was to be the pattern for the tip. The barrel was to be shortened to were the tape starts
Deanes desired pattern (2).png

Photo2241.png

Photo2247.jpg
Photo2249.jpg
Photo2255.jpg
Photo2259.jpg

The two round of tape are to indicate where the schnabel will start and stop as the barrel was going to be shortened.
Photo2268.jpg
Photo2278.jpg


And the shaping starts

Photo2281.jpg
Photo2283.jpg
Photo2285.jpg
Photo2292.jpg
Photo2293.jpg
 
Last edited:
Photo2296.jpg
Photo2297.jpg
Photo2298.jpg
Photo2299.jpg
Photo2301.jpg


Photo2315.png
Photo2318.png
My sako schnable.png

Photo2321 (2).jpg
Photo2325 (2).jpg

Dean sent me a pic or two after the barrel dad been shortened and the sights added.
PNhAVEJl.jpg

9dkvihxl.jpg

Gizt4gfl.jpg
 
That Sako looks nice. Just. That schnabel. The guy got exactly what he asked for ... but ...

kirves.jpg
 
That Sako looks nice. Just. That schnabel. The guy got exactly what he asked for ... but ...
Definately not to my taste but it was another stock to do and the challenge of making it exactly as he wanted.
 
This was another for Euan as this CZ is one of his work rifles (pest animal shooting) had had an altercation with his 4 wheeler with this being the result
Photo2719.jpg

Glue it back together to get the pattern
Photo2720.jpg

A couple of planks of Beech came with it to use for these cheap replacment stocks
Photo2721 (1).jpg
Photo2727.jpg
Photo2728.jpg
Photo2730.jpg
Photo2763.jpg
 
Last edited by a moderator:
And a re-shaping of the horrible roll-over comb/cheekpiece, plus a shorten and slim down on this mini mauser which was like a thick plank for such a nice little action
Photo2837.jpg
Photo2841.jpg
Photo2842.jpg
Photo2843.jpg
Photo2875.jpg
 
Last edited by a moderator:
A K-hornet restock for Euan who wanted a traditional look to the stock but with a combline that would afford a better scope allignment
Photo1282.jpg


What I decided to do was to change the line of the throughbolt to lift the comb while still appearinmg to be a standard stock as you can see from this pic of the bolt hole line marked on the stock. The dotted line is the traditional bolt hole line and the solid line will lift the comb line although I also added a little to the comb height as well but not enough to be really visible on the finished stock .
This is how I drill the bolt hole. I use the drill cradle to support the larger bit bit as I make the initial centering mark that also fits over the thread exceptance projection in the wrist socket. Then the long bit, which is just a length of mild steel that has had a "D" flat milled into the end that has been sharpened with a bias to cut as it turns. Tha larger bit is also mild steel and is for the counter bore to take the head of the stock bolt
Photo1293.jpg

Photo1292.jpg

Photo1295.jpg

A much slimmer fore stock will make for much less bulky feel in hand.
Photo1300.jpg

Photo1306.jpg

Some alkanet rood in the finish and another rifle on its way back to Euans stable of workhorses.
Photo1310 Euans Martini Hornet.jpg
Photo1311.jpg

Photo1312.jpg
Photo1313.jpg
 

Forum statistics

Threads
53,614
Messages
1,131,156
Members
92,669
Latest member
WillieBurk


Latest profile posts

Impact shots from the last hunt

Early morning Impala hunt, previous link was wrong video

Headshot on jackal this morning

Mature Eland Bull taken in Tanzania, at 100 yards, with 375 H&H, 300gr, Federal Premium Expanding bullet.

20231012_145809~2.jpg
 
Top